
I’ve spent the last 10 days trying to modify the NASCOM BASIC to add new commands to the interpreter. The job wasn’t easy because we’re talking about a 42 years old programming language, and the documentation that we can find online is poor and incomplete. By the way, I made some changes and added a counter for 100ths of a second based on a double-word (32 bits) counter incremented with an interrupt raised by the Z80 CTC of our LM80C and read through a new command, TMR().
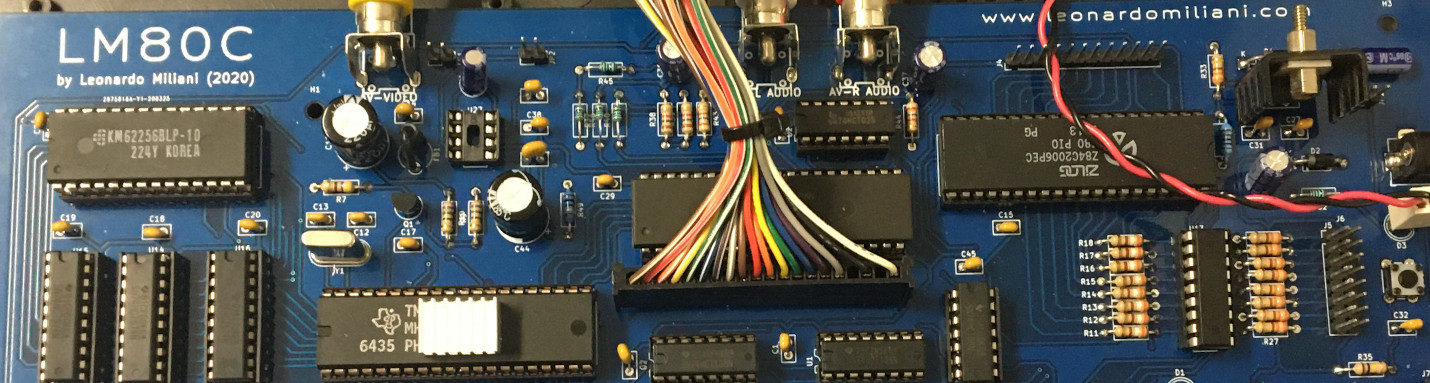
But let’s rewind the tape and start from the beginnings… As I said previously, not onyl I wanted to insert the 100ths of a seconds counter but also add a new command to be able to get the actual value in an easy way. The difficult was to understand the interpreter first… Let me explain. At the time of the release of the NASCOM BASIC having access to the source code of a software was very unfamiliar since every developer only distribuited the binaries of its works. In the case of built-in interpreters, stored in the ROM memory of a computer, the user could access to the program in its entirety but this was in a disassembled form. For “disassembled” I mean the reverse action of the compilation: when we write a program in assembly, there’s a program called “assembler” that trasnslates the mnemonic instructions of our source in something that can be understood by the CPU, the machine-language instructions. The disassembler is a program that makes the opposite operation: it takes a machine-language software and reverts it into a list of assembly mnemonics. The easy part of the process was the reversion itself, since the compiled software was stored inside the memory of the computer. The hard part of the process was “understand” such disassembled version of the software: since assembly isn’t an high-level programming language it doens’t have any variable nor subroutines with self-explaining names that can help to understand what the software tries to do so we must spend a veeery lot of time jumping from a point of the disassembled list to another one. Fortunately, the disassembled list of NASCOM BASIC was published (with comments) in a specialized magazine of the 80s’ dedicated to NASCOM computers, “80-BUS News”. NASCOM was a british computer manufacturer that developed a terminal system based on the Z80 computer, and licensed the BASIC from Microsoft, adding some improvements to use the hardware of their computers. Starting in 1983, the magazine published the disassembled list of the NASCOM BASIC. So, we have the source for a BASIC interpreter. Altough it’s a good interpreter, it is specific for the NASCOM computer, so it lacks some features while some are useless. Grant Searle made a very good job, by adapting it to its hardware but it’s still incomplete for our purposes since it doesn’t use the LM80C hardware at all. So, after adapting it to be used with the Z80 SIO instead of the MC6850, I decided to use another peripheral that is inside the LM80C, the Z80 CTC. A very important task of any computer is the time measurement. Timing is important: we can measure the interval between two events, we can set to make a particular action after a specific delay, we can keep a clock with time and date. The Z80 CTC is a very beatiful peripheral: it can be programmed easily for our purposes just by passing some commands at the startup. Since it has 4 timers and since we, at the moment, are using only only one of them to generate the RX/TX serial clocks, we can use another timer for our own needs. For this task we will use the timer 3, since it doesn’t have an output pin that can be triggered when the internal counter goes down to zero. I decided to set up a 100ths of a second counter: a 100th of a second is a good fraction of time, that it isn’t too long nor too short, a good compomise. To free us from the duty to read the timer and increment our counter we will use an interrupt hooked up to the timer 3. When raised, it will “interrupt” the main code and will force the CPU to execute the corresponding interrupt service routine (ISR). You can remember that we already had used this feature in the past, when we used the Z80 SIO t increment the binary counter that we set up with the Z80 PIO. We just have to set up the timer 3 to raise an interrupt after a certain interval. To find the right timing, let’s make some maths assuming that:
Fsys = 3,686,400 Hz

Timer prescaler: 256x

Fint = 3,686,400 / 256 = 14,400 Hz
We are close to the correct result. Since we want an interrupt every 1/100th of a second we need a frequency of 100 Hz. Since the above value is 14,400 it’s easy to find the value to set into the timer register:
14,400 / 100 = 144
So, by setting up the timer to divide the system clock by 256 and using a starting value of 144 we will get a precise clock of 100 Hz, meaning 100 increments for a second. When the interrupt will be acknowledged by the CPU, it will increment a 32-bits counter (4 bytes of memory). With 32 bits we can measure 4,294,967,296 increments before the counter overflows and start from 0 again. 4,294,967,296 increments are about 42,949,672 seconds, or 497 days: more than a year, I think that’s enough…
If you look at the code, you will see that the counter is stored in RAM from $812E to $8131 (33070-33073). We could just read those RAM cells but we wanted something more, isn’t it? So I’ve decided to add a new function that read the word (a couple of bytes, 16 bits of data) specified by the given param. Our function will be called TMR() and it will get a numeric param:
TMR(x)
If ‘x’ is equal to ‘0’ then the function returns the value of the first 2 bytes, the less significant bytes, which are incremented more frequently; otherwise, if ‘x’ is equal to ‘1’ then the most significant bytes will be returned.
To add this new function I had to modify the BASIC source code in several parts, because of the way the programmers chose to recognize the keywords. To save memory and to speed up the execution of the different instructions, they opted to store the function and command keys using “tokens”, special single-byte codes so that, i.e., a command like “PRINT” could be stored using only 1 byte. This lead to a more efficient memory usage and a faster decoding during execution. During the instructions’ inserting, the interpreter recognizes the different keywords and transform them in their corresponding token forms (we say that it “tokenizes” the commands). When the interpreter executes the user’s code, it just has to read 1 single byte to decode the instruction: to each token one and only one instruction is associated. Due to this way of storing the lists, not only I had to modify the portion of code that recognizes the instructions but the one that manage the tokens, too. There is another problem: the interpreter differentiates between “commands” and “statements”, or better say, the interpreter works in 2 modes: direct and indirect mode. In direct mode the interpreter executes the instructions as they are entered while in indirect mode the interpreter executes instructions from a program stored in memory. Commands are instructions normally used only in direct mode while statements are instructions normally used only in indirect mode. A command is CONT(inue), since it has no meaning inside a program list. Since my new instruction is just a simple function it can be used both as a command and as a statement. The first change has been made here, the list of the table that list the addresses of the supported functions:
; FUNCTION ADDRESS TABLE (this is a sort of offset table)

FNCTAB:

defw SGN ; this list must be coherent with the tokens' functions list

defw TMR ; added by Leonardo Miliani

defw INT

defw ABS

defw USR
The second line contains my new function. After this, I had to insert the name of my function in the list of reserved words, too. This list contains all the words that are reserved to the interpreter and that cannot be used by the user, i.e. as a name for a defined function with DEF or as a variable name.
; RESERVED WORD LIST

; Here are all the reserved words used by the interpreter

; To add custom functions/commands, the user must insert the keyword

; in this list, following the schematic

WORDS: defb 'E'+80H,"ND" ; from here the list contains the commands

defb 'F'+80H,"OR"

(....)
This list is divided in several sections. The last one contains the list of the reserved words used for the functions. This sections start with the SGN function. The reserved words list is also an offset list, so the position is important, since the interpreter counts from SGN to the last word to get the offset to jump to the corresponding code recovered from the first list we encountered above. Here is the change:
defb 'S'+80H,"GN"

defb 'T'+80H,"MR" ; <-- added by Leonardo Miliani

defb 'I'+80H,"NT"
As you can see, every word is coded in a particular manner: the first letter is taken and then $80 is added to it, and finally the rest of the letters are stored as they are. After this point, scrolling down the code we can find another section called “RESERVED WORD TOKEN VALUES”: this list lists the token code for each keyword. The list doesn’t contain every single keyword because the interpeter recognizes the “class” of the keyword, i.e. a function, by findind it in a specific range of values. Since we added a new function, functions in the interpreter are store starting from the SGN function. So, as we have to insert a new function, we must increment the value of the last functions stored in the list after SGN, that are ZPOINT and LEFT$.
So I changed this portion from this:
ZSGN equ 0B6H ; SGN

ZPOINT equ 0C7H ; POINT

ZLEFT equ 0CDH +2 ; LEFT$
to this:
ZSGN equ 0B6H ; SGN

ZPOINT equ 0C8H ; POINT ; if the user enters a custom function,

ZLEFT equ 0CEH +2 ; LEFT$ ; must be increment these two pointers
Now, when we’ll have to use the new function, the interpreter will look at the list of the reserver words to see if it’s a supported function: if it will find it into the list the name will be recognized as a reserved keyword so the interpreter will analyze its usage to undestand if it’s a function or a command, then it will jump to the corresponding code recovering the starting address of the code from the jump table.
I also made another change. Since the BASIC was written at a time when memories were very expensive, to save space programmers stored the error messages in a very compressed mode: only 2 letters for each error message! Since I don’t have a very good memory and since the LM80C has a big ROM (32KB!), we can insert complete messages to better understand what’s going wrong. So you will get a “NEXT WITHOUT FOR ERROR” message instead of a too succint “NF ERROR”! To achieve this I used the same trick programmers used for the tokens table: the code of the error identifies an entry in the error table from which the code recovers the long message text and prints it.
That’all. As usual, you can find the code in my GitHub repo.