
In this article I’ll show you how to update the Atmel toolchain on OS X systems to be able to use the newest compiling tools available. First, I have to say that the compilation of the toolchain on OS X is painful! Thanksfully, we can solve this problem using CrossPack! CrossPack contains the toolchain compiled and ready to use on our system that we can download and install in a couple of minutes. Be careful: CrossPack only runs on OS X 10.6 or newer, this guide has been tested on Mavericks: I think that everything can work on older versions of the system with few (or, maybe, no) changes.
[notice]It is required that you have a minimal knowledge of the terminal, that is necessary to insert some commands. Nothing of trascendental, but just a little familiarity with it because with “sudo” and the terminal we can alter the system, and if we insert the wrong command we can damage important files.[/notice]
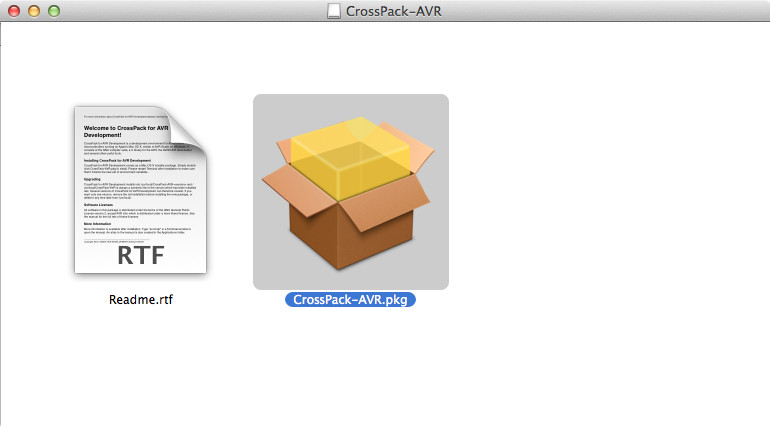
First, we need to get the last version of CrossPack from this page. At the time of writing this guide (06/21/2014) the newest version is the CrossPack-AVR-20131216 (thas’s been released on 12/16/2013). Download the .dmg file, then install the suite with a double click on the icon of the packag “CrossPack-AVR.pkg“.
When the installation has been terminated, we need to do the most complicated part of our work, we have to use the terminal. Open the Launcher then select the app “Terminal” or, if it’s in your Dock Bar, open it from there. Now it’s important that you type the following commands with no errors (adapting them to your system, when needed). So, let’s go into the system folder where CrossPack-AVR is, with:
cd /usr/local
If you type the following:
ls -la
you can see the detailed list of the files of that folder:
drwxrwxr-x  21 root            admin 714   27 Apr 12:00 .
drwxr-xr-x@ 12 root            wheel 408   27 Apr 11:56 ..
-rw-r--r--@ 1  leonardomiliani admin 6148  4  Mag 12:29 .DS_Store
drwxr-xr-x  13 leonardomiliani admin 442   27 Apr 12:28 .git
-rw-r--r--  1  leonardomiliani admin 246   27 Apr 10:52 .gitignore
-rw-r--r--  1  leonardomiliani admin 3158  27 Apr 10:52 CODEOFCONDUCT.md
-rw-r--r--  1  leonardomiliani admin 687   27 Apr 10:52 CONTRIBUTING.md
drwxr-xr-x  13 leonardomiliani admin 442   28 Apr 11:15 Cellar
lrwxr-xr-x  1  root            admin 22    31 Mar 15:49 CrossPack-AVR -> CrossPack-AVR-20131216
drwxr-xr-x  15 root            wheel 510   16 Dic 2013 CrossPack-AVR-20131216
-rw-r--r--  1  leonardomiliani admin 1253  27 Apr 10:52 LICENSE.txt
drwxr-xr-x  9  leonardomiliani admin 306   27 Apr 10:55 Library
-rw-r--r--  1  leonardomiliani admin 1708  27 Apr 10:52 README.md
-rw-r--r--  1  leonardomiliani admin 23719 27 Apr 10:52 SUPPORTERS.md
drwxr-xr-x  84 leonardomiliani admin 2856  14 Mag 18:44 bin
drwxr-xr-x  3  leonardomiliani admin 102   27 Apr 12:00 etc
drwxrwxr-x  18 root            admin 612   27 Apr 12:28 include
drwxr-xr-x  67 root            admin 2278  27 Mag 17:52 lib
drwxr-xr-x  14 leonardomiliani admin 476   28 Apr 11:15 opt
drwxr-xr-x  15 leonardomiliani admin 510   14 Mag 18:44 share
drwxr-xr-x  3  leonardomiliani admin 102   27 Apr 12:00 var
Let’s look at this: there are 2 folders that have a name that starts with “CrossPack-AVR“. One is the real folder that contains the toolchain, “CrossPack-AVR-20131216“, while the other one is just a link to it (notice the presence of the arrow “->“). Another thing to see is the name of the owner of the files and the groups. Mac OS X derives from UNIX and preserve a strict control on the access to the files depending on their onwer and the groups he belongs to, so that the actions of every user can only access his own files and the ones of the groups he belongs to. As you can se, the folder that contains the CrossPack’s toolchain belongs to the “wheel” group that, on *NIX systems, is a special group that contains the users that can become “superuser” (that is, they can operate as if they would be the administrator user, “root“, with the command “sudo“) but also can access to particular peripherals and/or files. In our case, we need to belong to the group “wheel” to be able to compile and send our sketches to the Arduino boards. To be able to do this we need to assign our user to the group “wheel” with the following command:
sudo dseditgroup -o edit -a USERNAME -t user wheel
Don’t forget to substitute “USERNAME” with the username that you chose when you first started Mac OS X. It is easy to find your username because it is shown on the terminal prompt after the name of you computer. In my case is:
iMac-di-Leonardo:/ leonardomiliani$
So my username is “leonardomiliani“.
Now, let’s come back to the graphic environment. Now we need to create a copy of the Arduino IDE with the new toolchain in. Go to this page and download the last version of the IDE, if you already don’t have it on your system: at the time of the writing, the last version of the IDE is the 1.0.5.
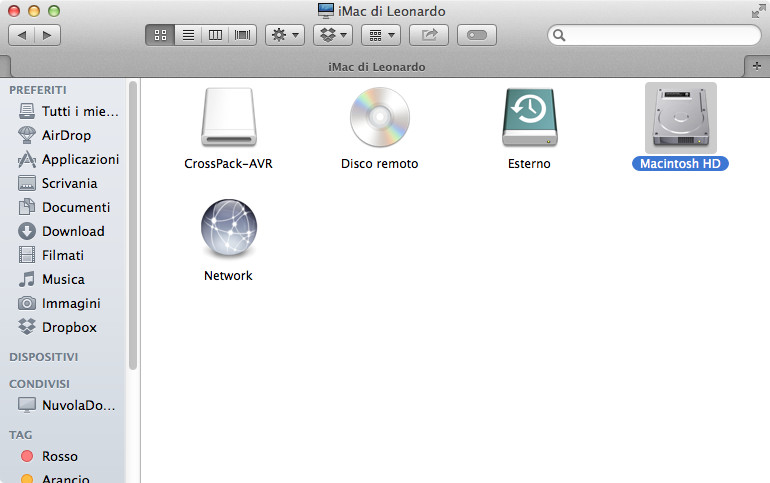
Because we need to work inside the package of the Arduino app, it is saver if we install it inside the folder Applications of out user. If you already have the Arduino IDE installed on your system, open the folder then select “Applications” from the menu on the left, then right click on the app and choose “Duplicate”, or select it with a mouse click then, from the menu “File“choose “Duplicate“. The system will create a copy of the app. Now open another window of the Finder and then select from the menu “Go” and then “Computer“: the view of the peripherals of your Mac will be shown. Now click on the icon that represents your hard disk (usually it’s named “Macintosh HD“), then click on “Users“, then on the home icon with your username, and finally on the folder named “Applications“. This contains the apps that has been installed only for your user: as you can see, they are few, if compared with the apps that are present on your system. We’ll use this folder also because we have a simple path that is accessible by our user without the need to have particular permissions.
 Now that you are reached the “Applications” folder of your user, drag the copy of the Arduino IDE that you did previously and drop inside this folder, and then rename it with a descriptive name, i.e. I chose “Arduino 1.0.5 crosspack“.
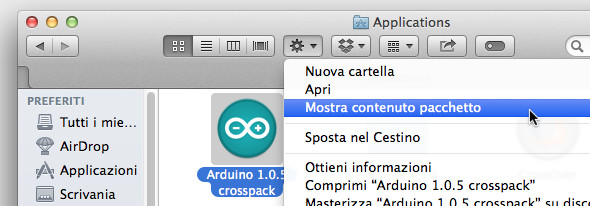
Now right click on the app and choose “Show Package Contents“, or select the icon with a click and then, from the actions menu (the wheel icon of the Finder), click on “Show Package Contents“, and enter inside the app itself.
 Now navigate through “Contents/Resources/Java/hardware/tools“: at the end of this path you’ll fine a folder named “avr“. It contains the original toolchain shipped with the Arduino IDE. We need to delete it: be quiet, you’re working on the copy of the Arduino IDE, remember? So, drag that icon and drop it into the trash (remember to empty the trash, to be sure that the system won’t continue to keep track of it). Now you have to insert the new toolchain inside the copy of the IDE. Since the toolchain is already present in your system (you had installed the CrossPack app, it’s in it) the easiest way is to use the potentiality of *NIX systems and create a symbolic link.
So, open again the terminal and type the following command:
cd '/Users/USERNAME/Applications/NAME_OF_THE_COPY_OF_THE_IDE.app'
by substituting “USERNAME” with your username and “NAME_OF_THE_COPY_OF_THE_IDE” with the name that you previously have choosen for the app. Don’t forget the single quotes: they are important if, like in my case, you chose names with spaces. Without quotes, the terminal will interpret the spaces for separators between the parameters of the command, giving back errors. In my case, I’ll type in:
cd '/Users/leonardomiliani/Applications/Arduino 1.0.5 crosspack.app'
Now, move to the folder that will contain the symbolic link to the toolchain’s folder: it’s the same folder that contained the folder named “avr” that you had deleted a couple of steps ago. Type this:
cd Contents/Resources/Java/hardware/tools
Let’s create the sym link with:
ln -s /usr/local/CrossPack ./avr
If you now type in the following command:
ls -la
you’ll see the the folder “avr” is a sym link to “CrossPack-AVR” (notice the “->” chars).
Well done! We have finished our work. Close all the windows of the terminal, then open the Finder, then on “Go” and then on “Computer“, open your hard disk, your user’s home, then open the “Applications” folder. Now drag and drop the Arduino IDE with the new toolchain into the Dock Bar so that you’ll have it for a quick start and that’s all. Now you can open the IDE and use the new toolchain to compile your sketches by taking advantages by the latest compiling tools of the toolchain: avr-gcc 4.8.1, binutils 2.23.2, and avrdude 6.0.1. Enjoy!